Basic Backup With Clonezilla: Part-I(Backup)

I like to try out new things and experiment with my systems quite a lot, and because of that, sometimes things break or don’t quite work as expected. Sometimes it’s a compatibility issue or because I messed up something. And that has sometimes cost me a lot of unnecessary effort and time.
I mostly never have to worry about most of my data, as I keep backups for most of it, or they are on cloud storage that I keep in sync with my local storage. It’s the state of my system that sometimes throws me off-guard, like, for instance, when I won’t be able to boot because my new arch update had an issue with my bootloader, or sometimes a software update breaks in some unexpected way and I have to figure out what’s wrong and fix it. So I like to keep a backup of my system state so that I can restore it to a working state if something goes wrong, and I need it to work as soon as possible. And that backup is mostly a disk image of my system with minimal things installed and configured. For that, up until now I’ve used g-parted and dd for the most part, which are fairly basic and dumb utilities and work great. There are other, more advanced solutions out there, like Timeshift and Snapper, but they require a lot more setup and some insight into filesystems. For the most part, in my use case, I just want my system back up and running if I happen to break it. For the most part, I don’t require point-in-time backups or incremental backups.
One of the best and most reliable solutions is clonezilla which is a fairly straight-forward piece of software for imaging/cloning most kinds of disks. It also has some quite useful features that can be useful in certain situations. For now, we’ll go over some of the basic features of clonezilla and how to utilize them for simple backup and restore.
What is clonezilla?
Clonezilla is a partition and disk imaging/cloning program. Clonezilla saves and restores only used blocks on the hard disk. This increases the clone’s efficiency. It also has some additional features like enhanced support for all the major filesystems; therefore, you can clone GNU/Linux, MS windows, Intel-based Mac OS, FreeBSD, NetBSD, OpenBSD, Minix, VMWare ESX and Chrome OS/Chromium OS, no matter it’s 32-bit (x86) or 64-bit (x86-64) OS, images can be stored on a local disk, ssh server, samba server, or NFS server. Supports image encryption, and with the Clonezilla server, it can be scaled to clone multiple systems at once. There are three types of Clonezilla available: Clonezilla Live, Clonezilla live, Clonezilla lite and server edition. We’ll be using the live edition for our use-case.
Limitations
- The destination partition must be equal to or larger than the source one.InfoThough you can use utilities like
gpartedanother great utility, to resize the data partition to fit your needs, - Incremental backup is not implemented yet.
- Online imaging/cloning are not implemented yet. The partition to be imaged or cloned has to be unmounted.
- All the files have to be on one medium if you choose to create the recovery ISO file.
Creating a backup
For this purpose, we’ll be using the Clonezilla Live edition’s local device/device to image feature.
Download
Download the latest stable release of Clonezilla Live edition from their download page, in my experience, the official host, SourceForge, is very unreliable. You can download it from here if I happen to have the latest stable version. After downloading the ISO file, you have to burn it to bootable media to boot into it. You can use any tool of your choice to burn the ISO file to bootable media. I personally use ventoy for this purpose, as it’s very easy to use and supports most of the ISO files out of the box (more info about ventoy here).
Booting into clonezilla
Boot into the bootable media you created with clonezilla live edition. You should see a screen similar to the following. select the
Clonezilla live (VGA with large font & TO RAM)it’s the option I had most success with, and in my opinion, it looks better with large fonts.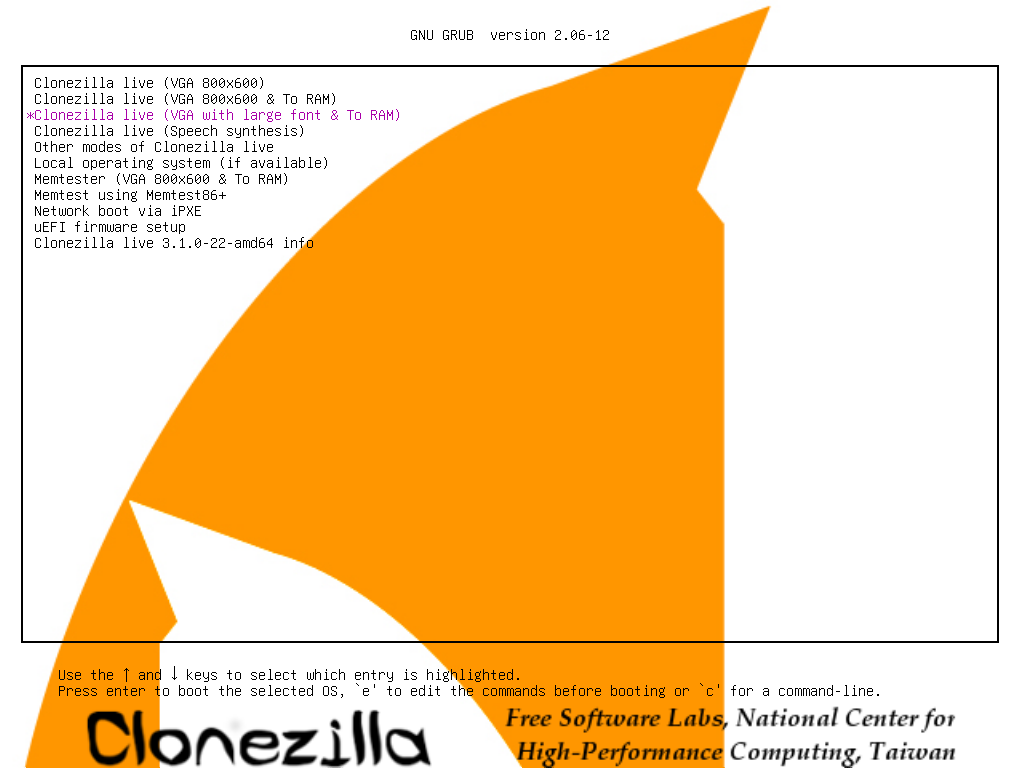
On the next screen, select English as the language, and after that, select to keep the default keyboard layout (for the most part, it should auto-detect the correct one).
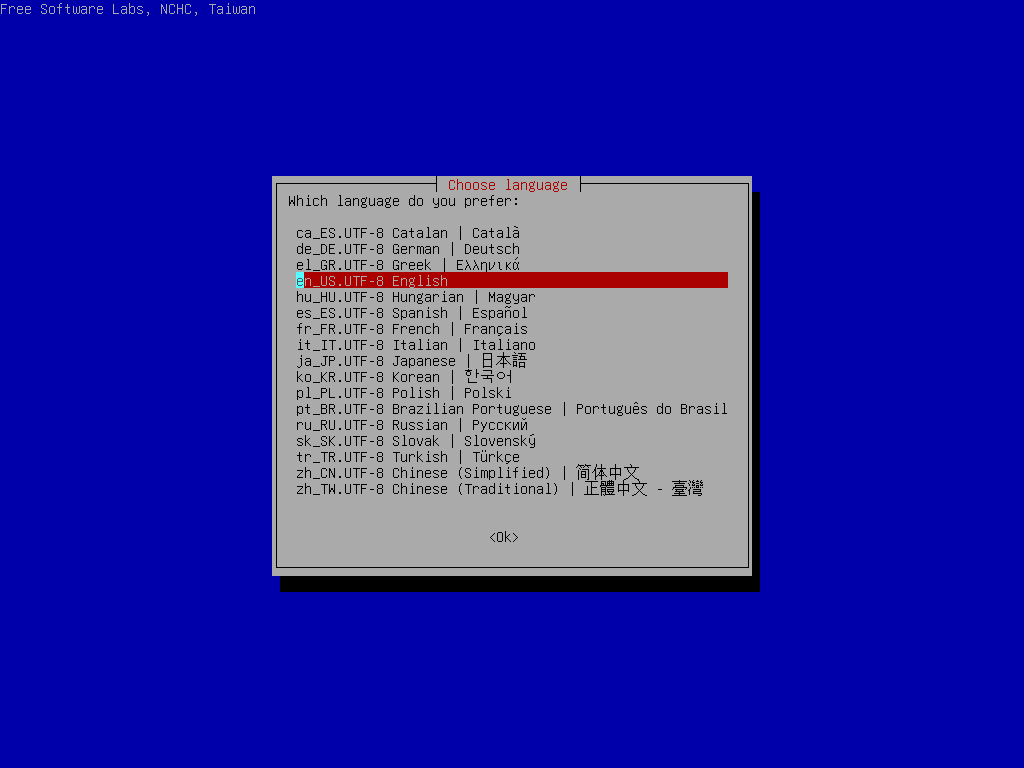
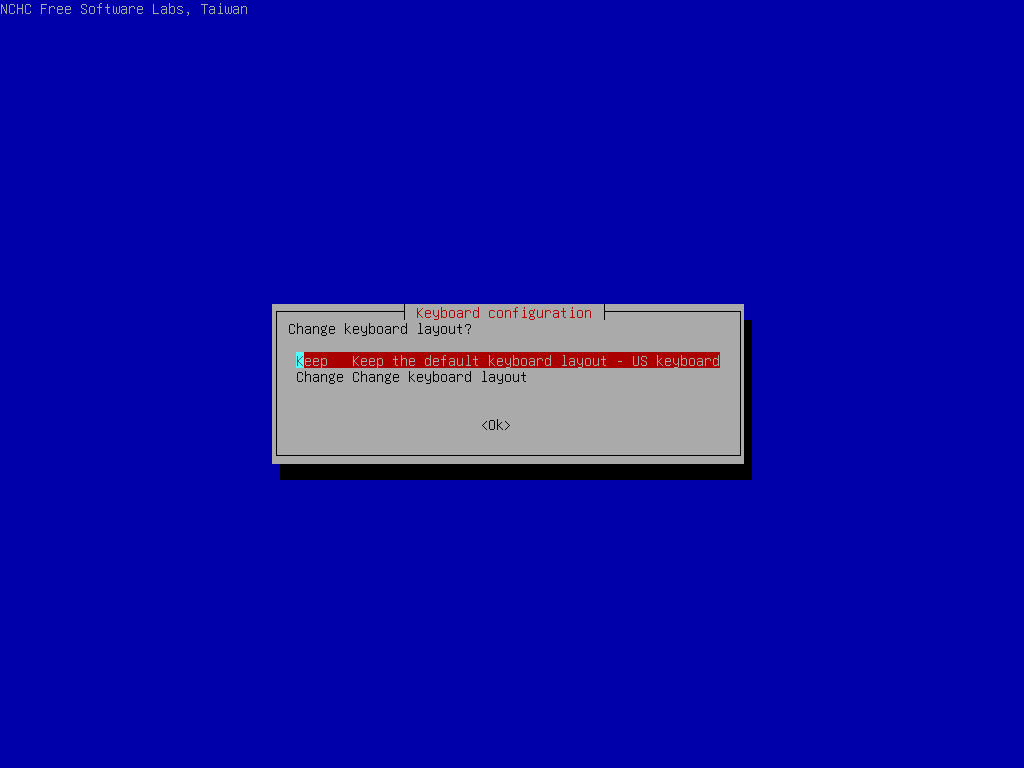
On the next screen, select
Start_Clonezillato start the clonezilla live edition.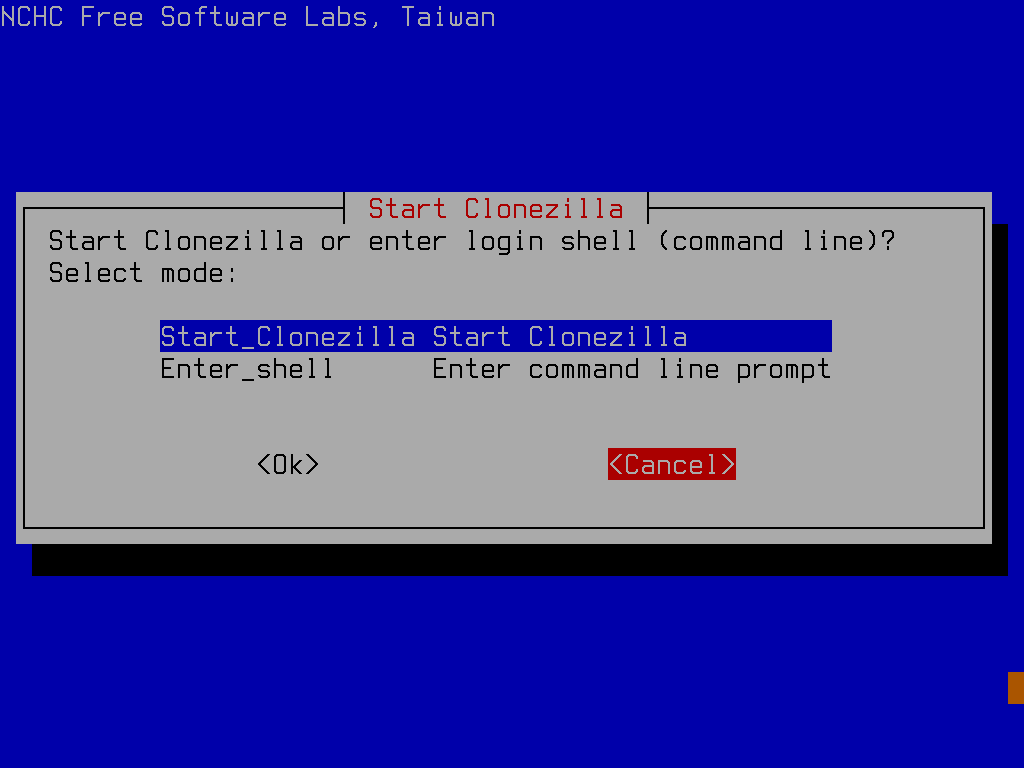
Using device to image feature
On the next screen, select
device-imagethis will create an image of the selected device and save it to another destination.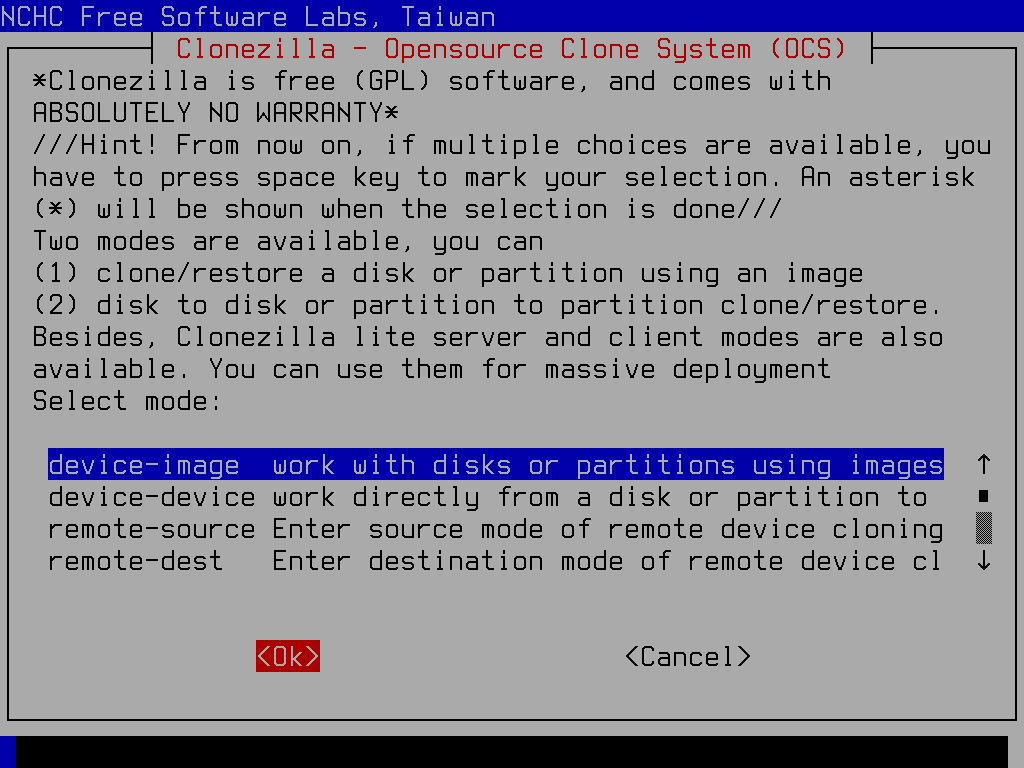
On the next screen, select
local_devto create an image of the local device. This will create an image of the selected device and save it to another connected storage device.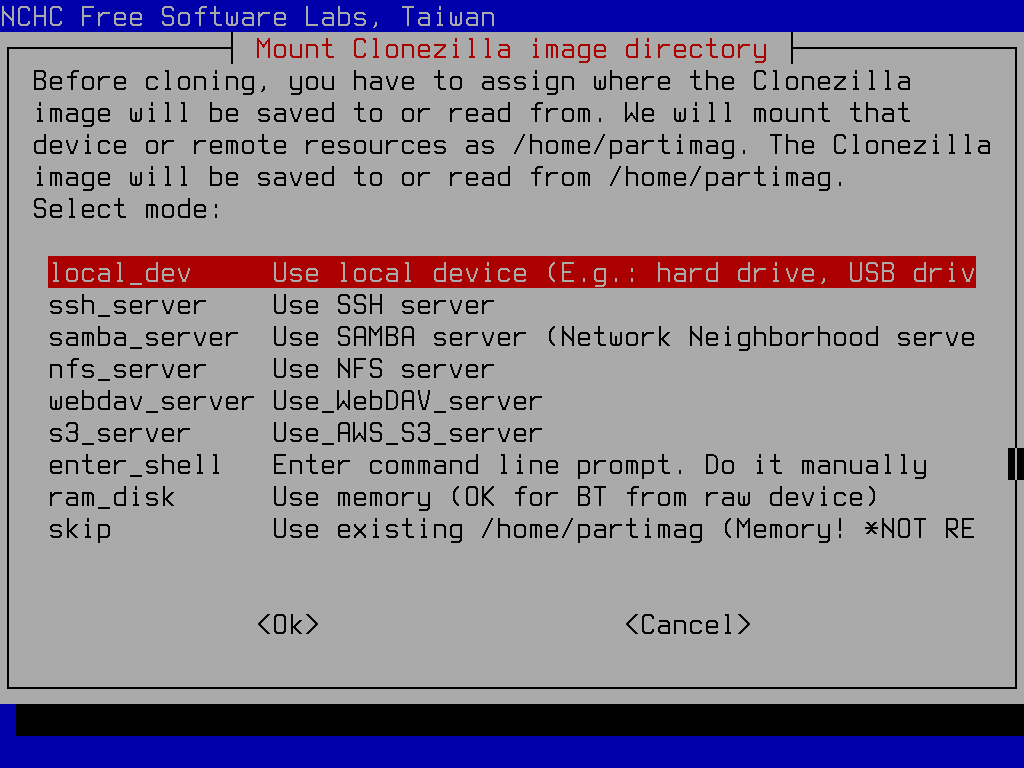
Now you will see a screen similar to the following, which suggests inserting any external storage device to save the image to. Insert the storage device and wait for it to be detected by clonezilla. After that, select
Enterto continue.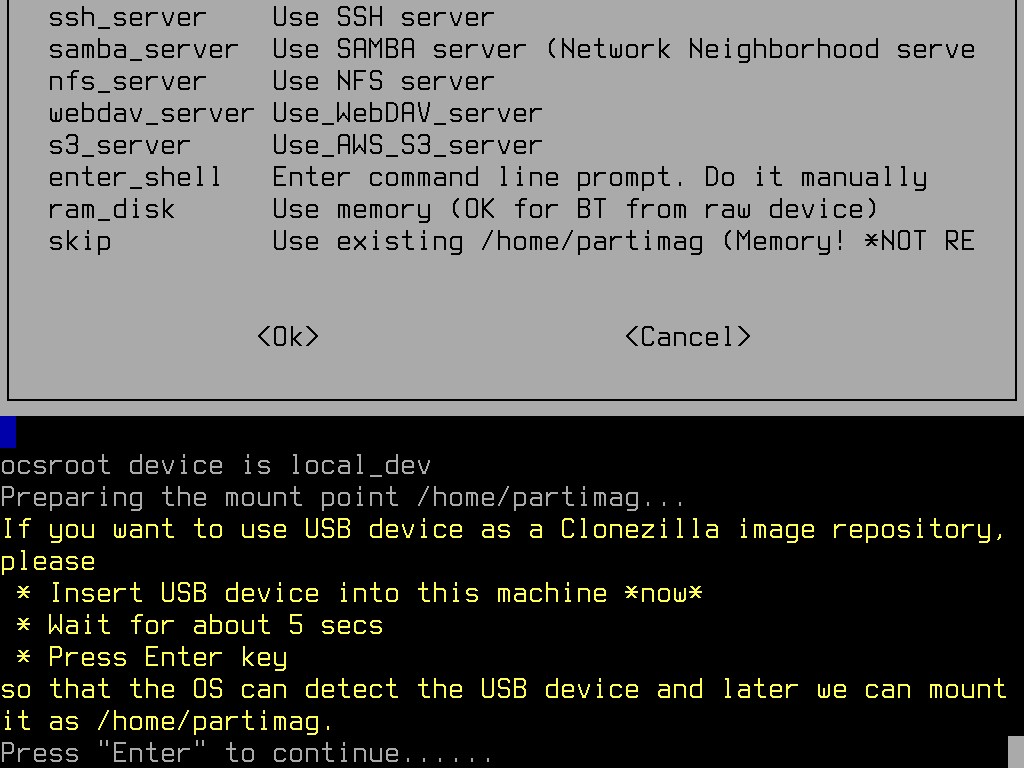
On the next screen, you should have a list of all the detected storage devices. If all your storage devices are detected correctly, then you’ll have to press
ctrl + cto continue (at first, this part confused me as it requires you to pressctrl + cto continue).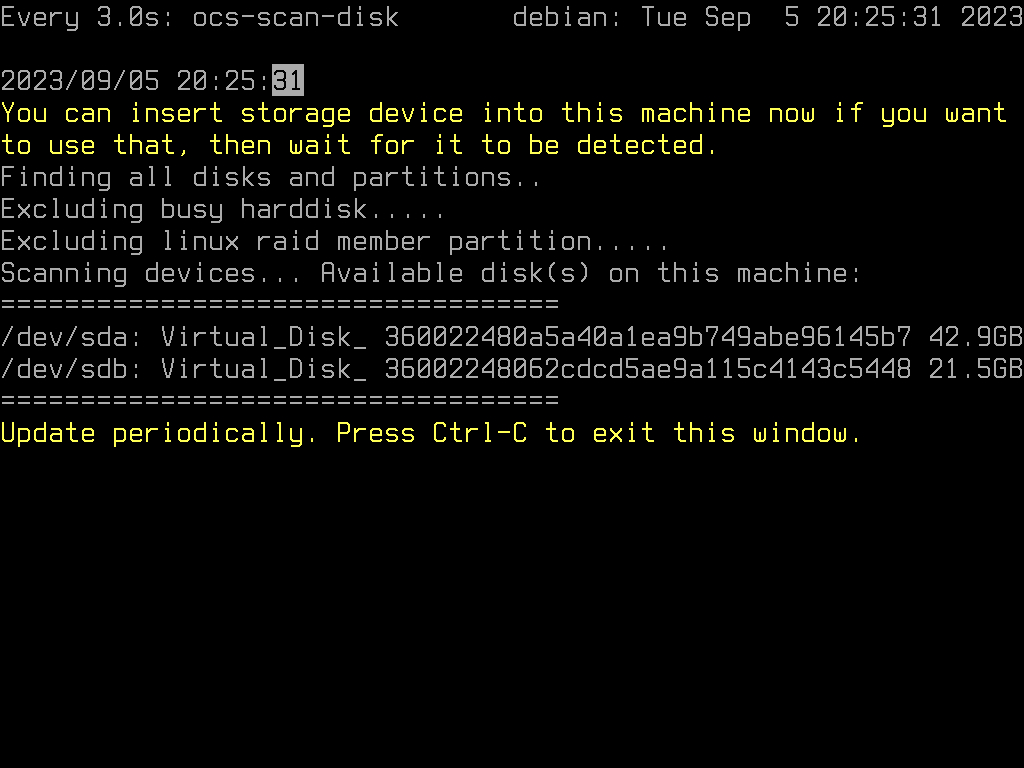
On the next screen, you’ll have to select the device you want the backup to be stored on (the destination/USB). Make sure you select the correct device, as this will overwrite the existing data on the selected device. After that, select
Enterto continue.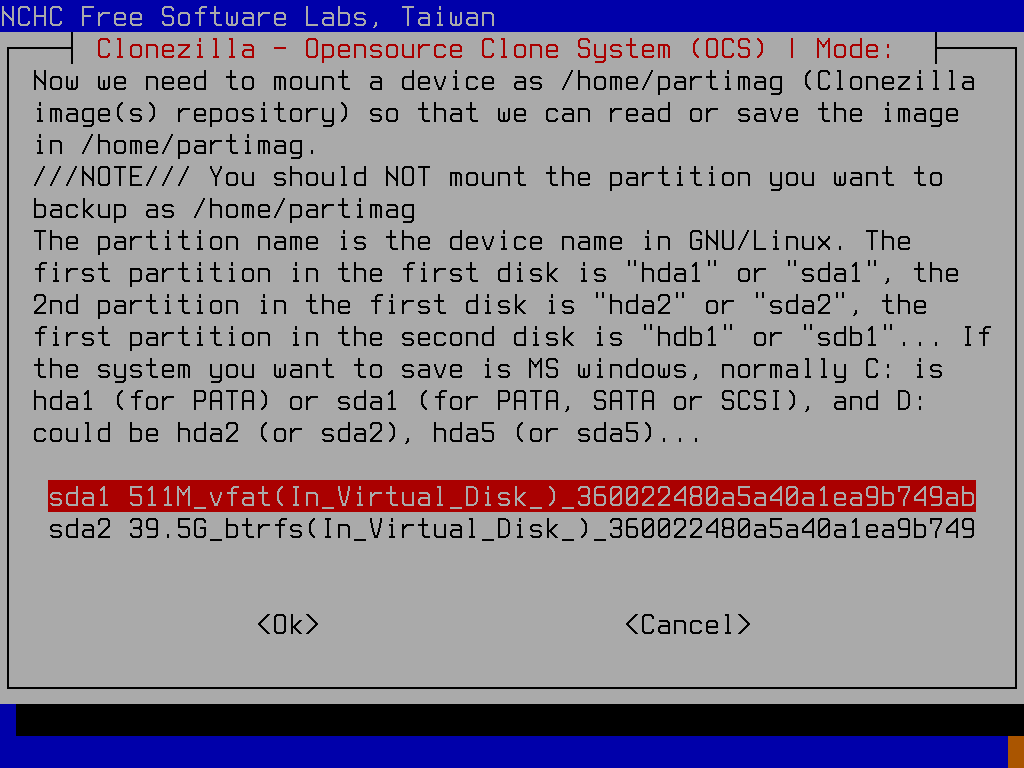
On the next screen, you can select
no-fsckto skip an additional file system check before creating the image to speed up the process. After that, selectEnterto continue.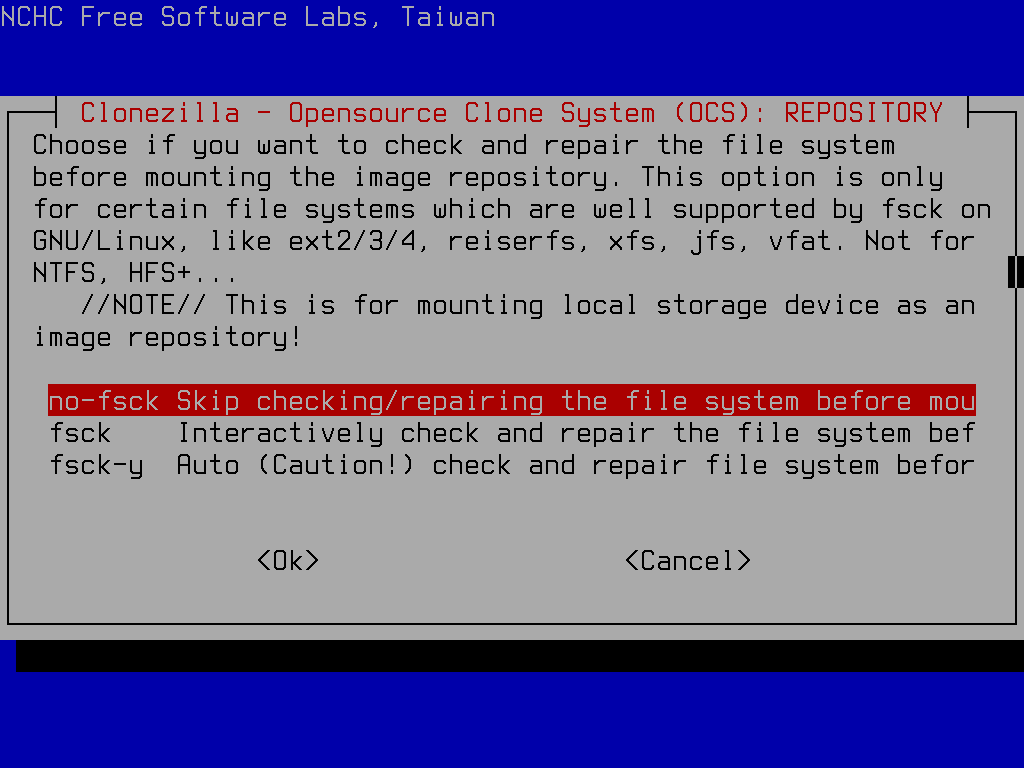
Onto the next screen, make sure the
Current selected dir nam:shows/usetabkey to select<Done>and pressEnterto continue.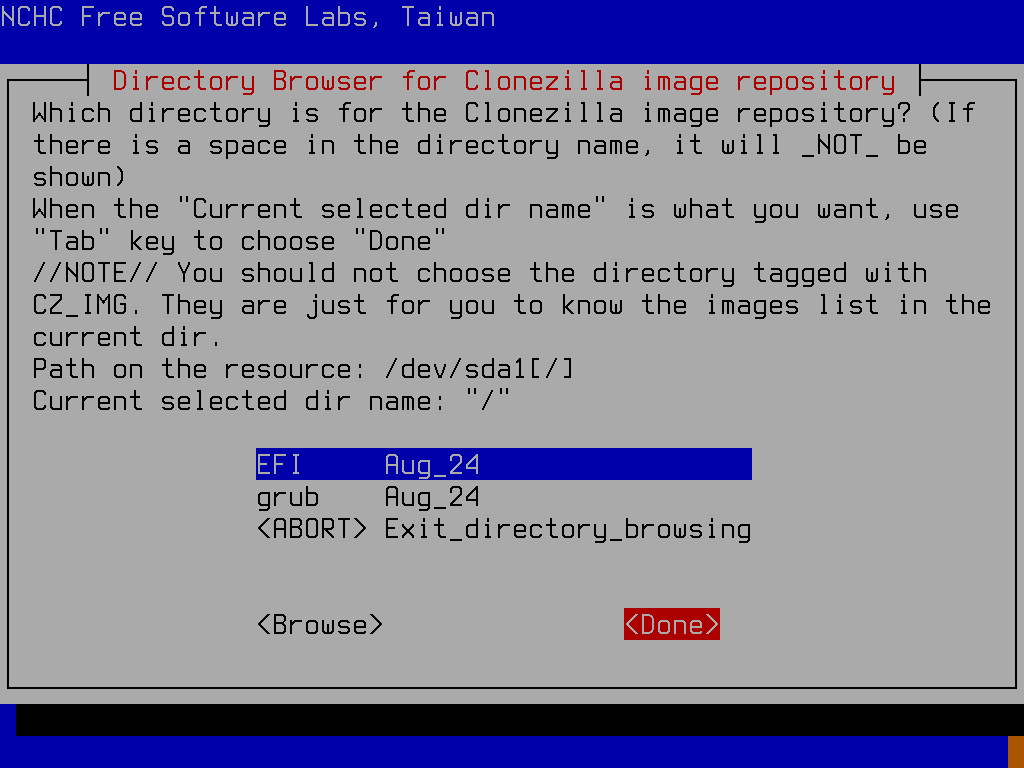
Press
Enterto continue.On the next screen, you can select
Beginnerto use the default options for creating the image. After that, selectEnterto continue.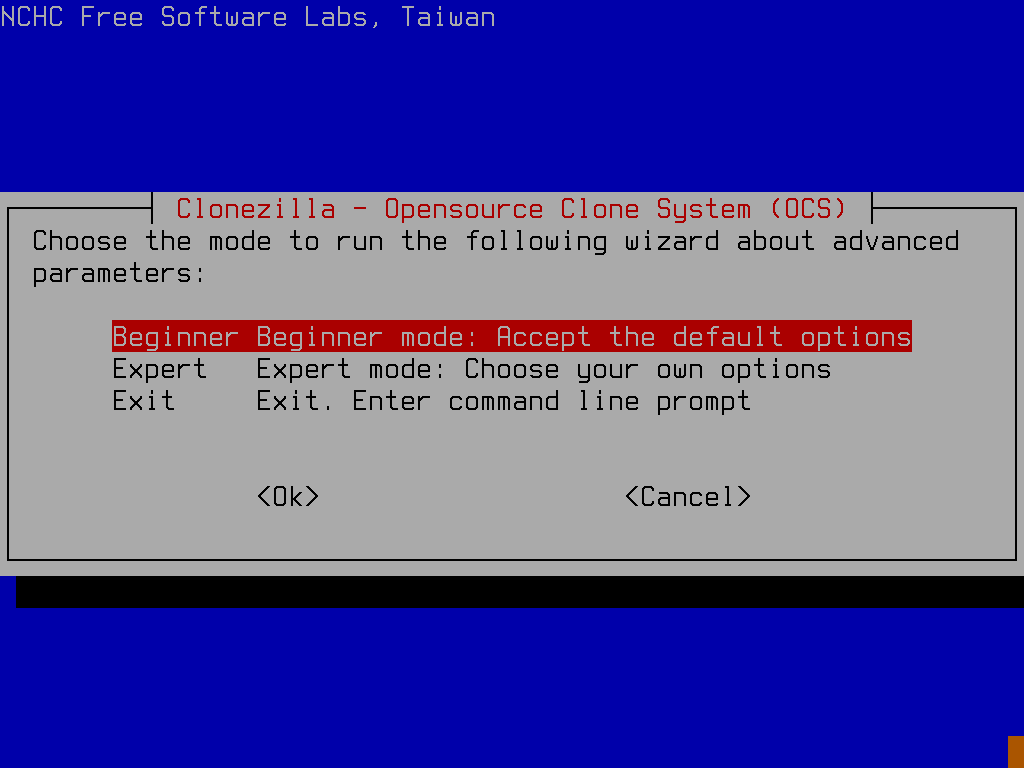
On the next screen, you can select
savediskto create an image of the entire disk. After that, selectEnterto continue.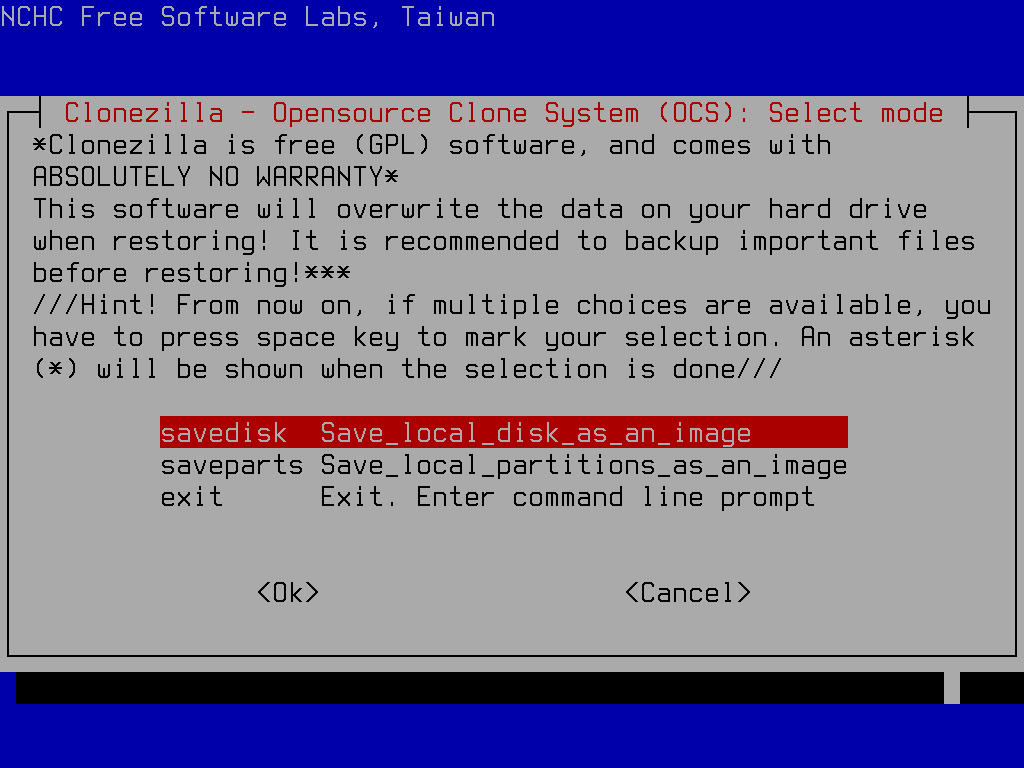
Next, you’ll be prompted to enter the name of the image file. You can use the default name or enter a custom name. After that, use
tabandEnterto continue.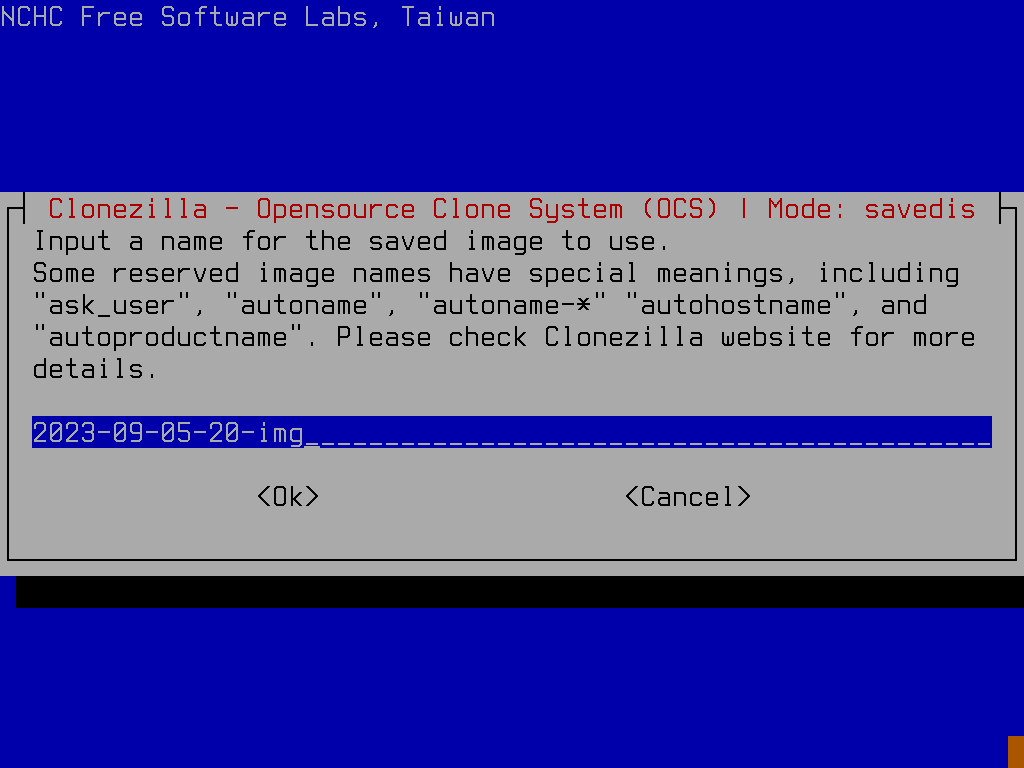
On the next screen, you’ll have to select the device you want to create the image of (the source). Pay attention to the device name and size to make sure you’re selecting the correct device. After selecting the device, press
Enterto continue.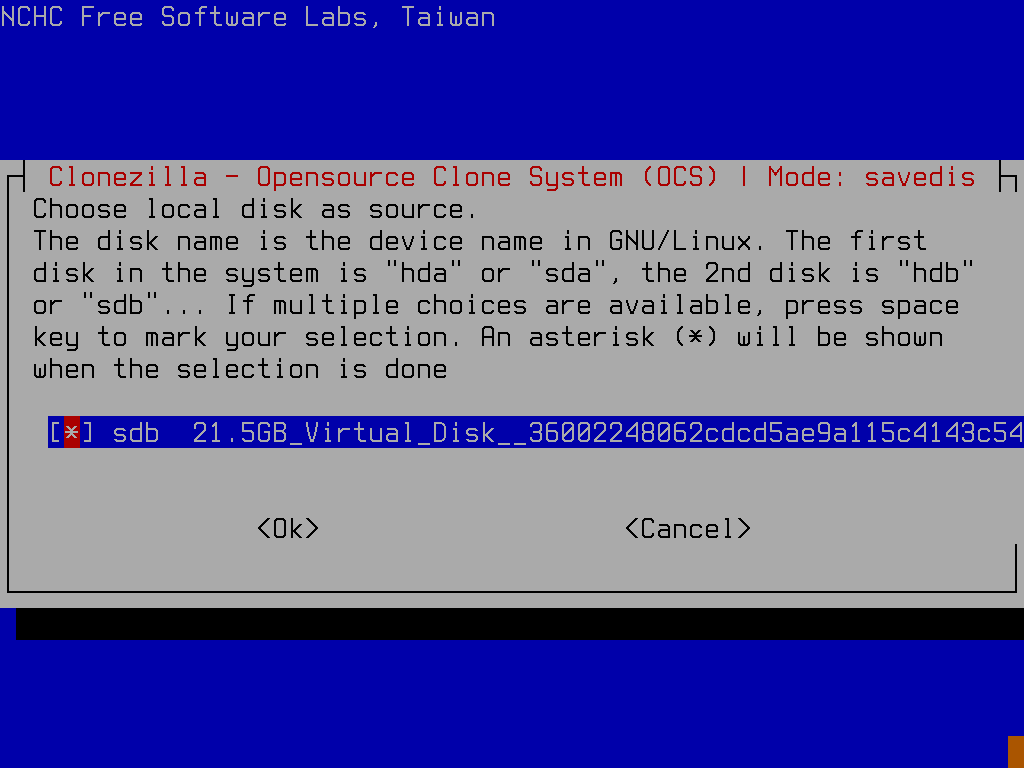
On the next screen, you can select the default compression level. After that, select
Enterto continue.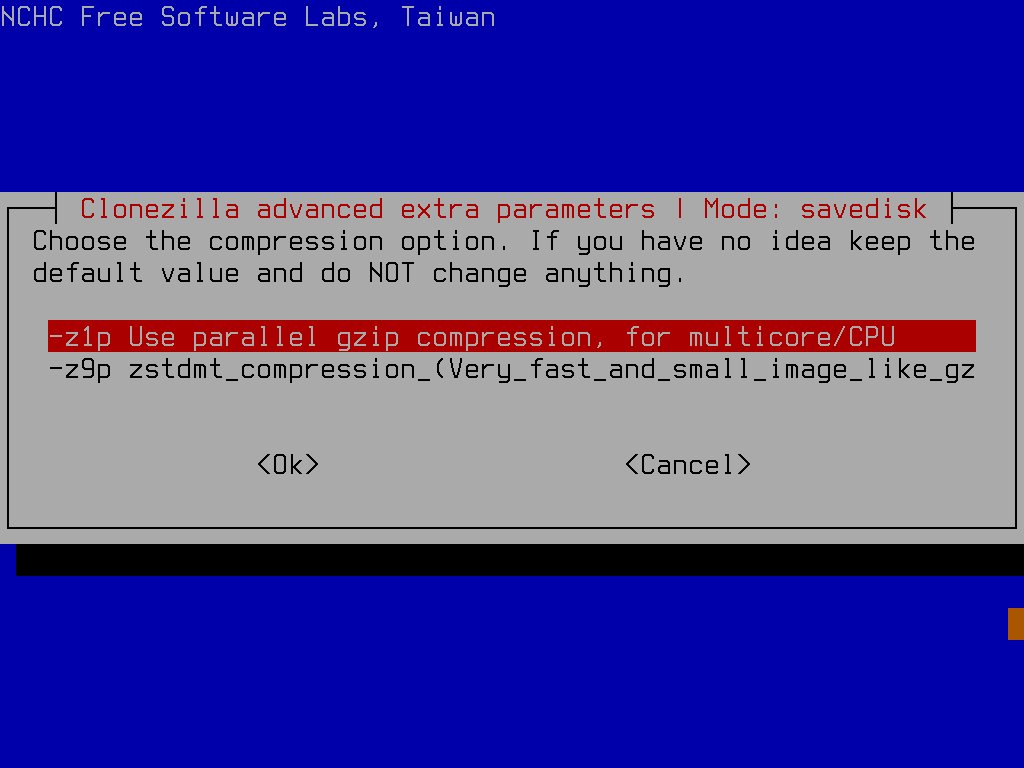
Next up, you can also skip the extra parameters check; press
tabandEnterto continue.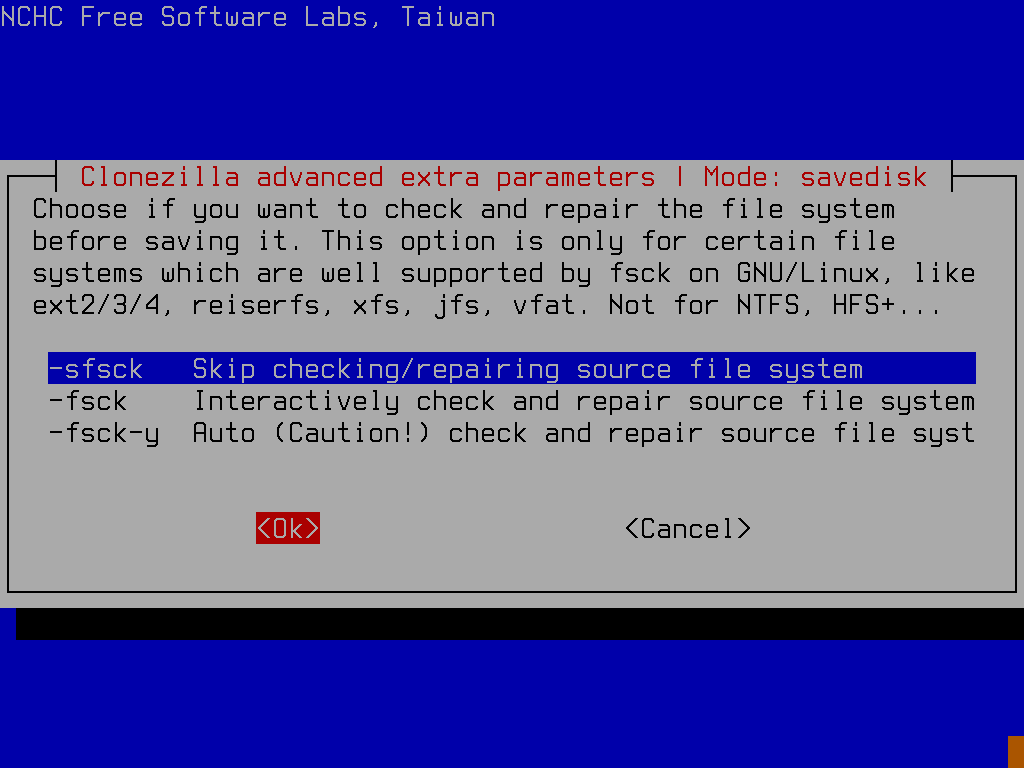
On the next screen, you’ll be asked if you want to check the image for restorability. You can skip or select the default option. After that, select
Enterto continue.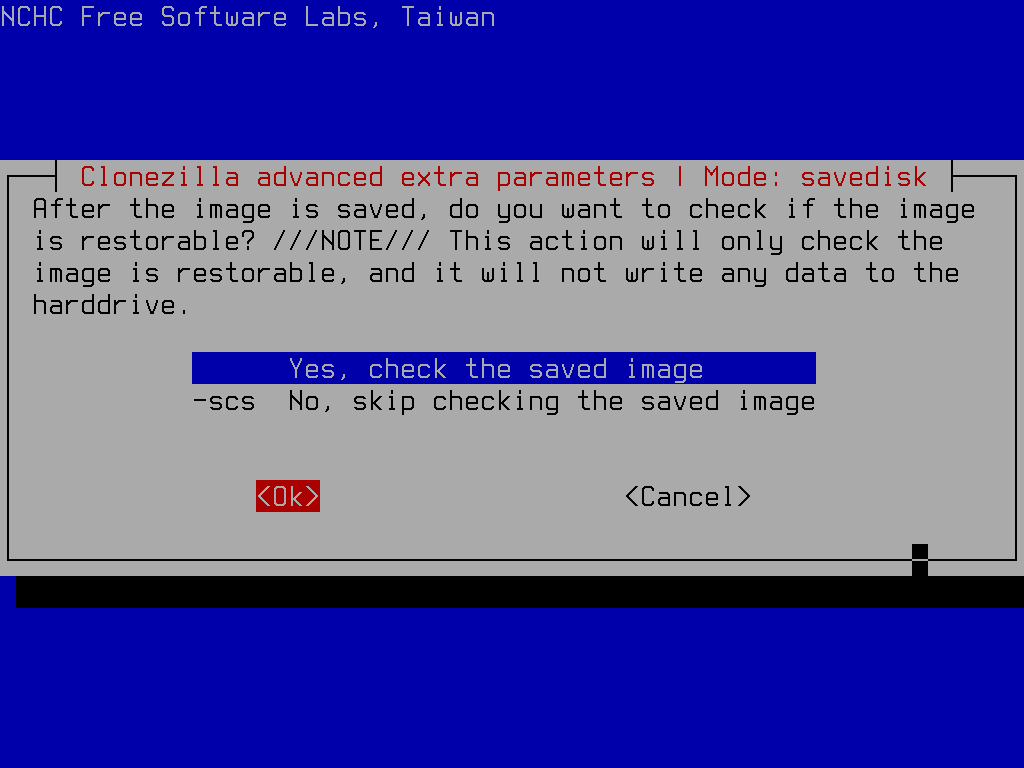
Next, select no encryption, or if you want to encrypt the image, select the option with the preferred encryption method. After that, select
Enterto continue.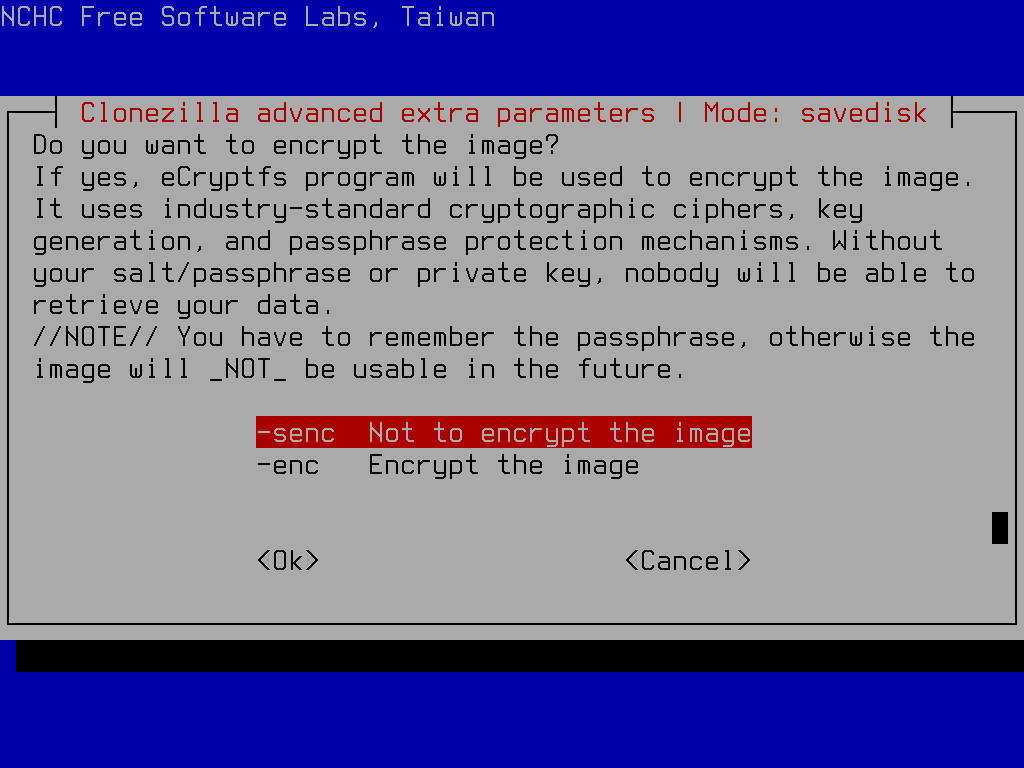
After you’ll be prompted to choose an action after finishing the creation of the image, you can select the default option and use
tabandEnterto continue.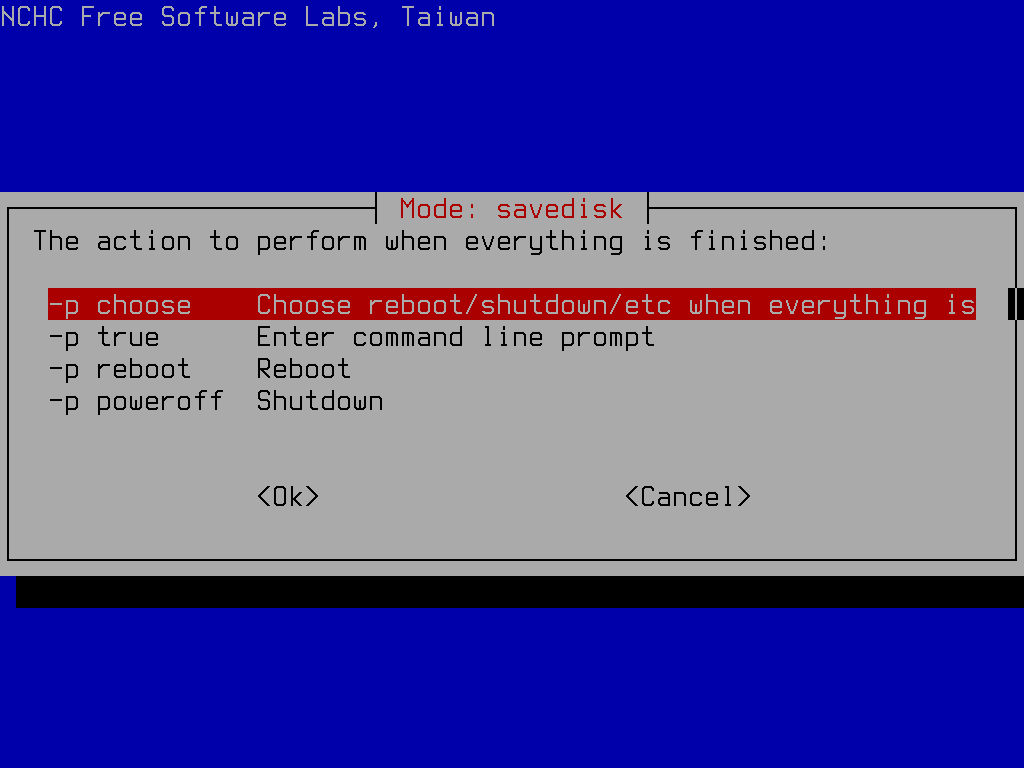
On prompt, press “Enter” to continue.
Press “y” to confirm and start the process.
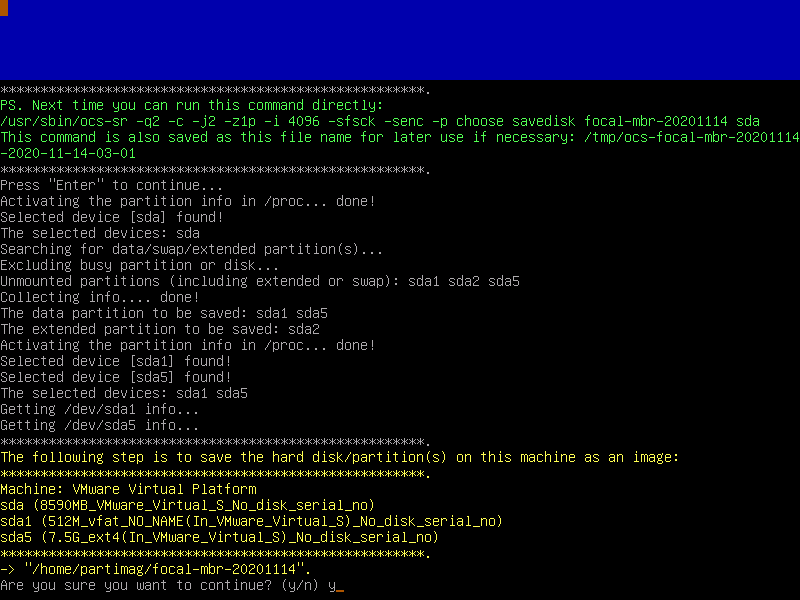
If everything is done correctly, the clone process should start, and you should see a screen similar to the following:
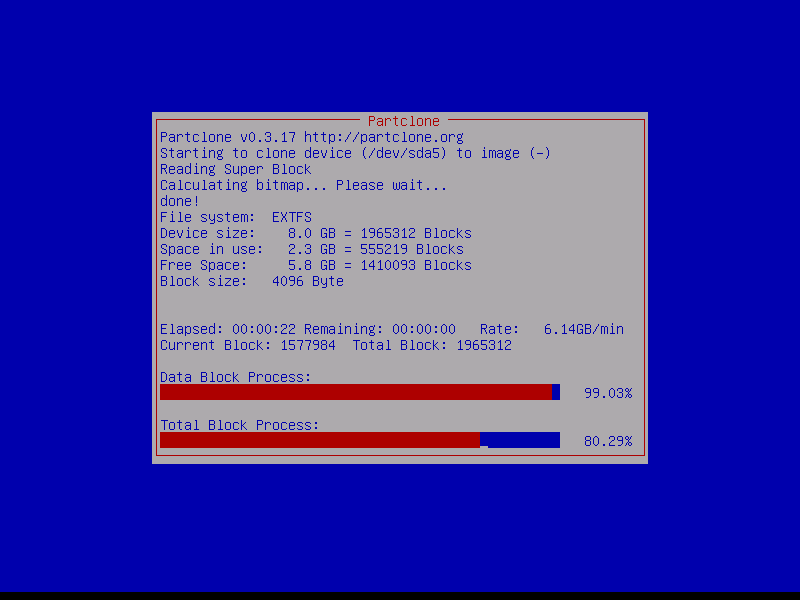
When everything is done, Clonezilla will prompt you if you want to run it again (when something goes wrong, or you want to choose different options)
Then you can choose to power off or reboot to exit clonezilla. After that, select
Enterto continue.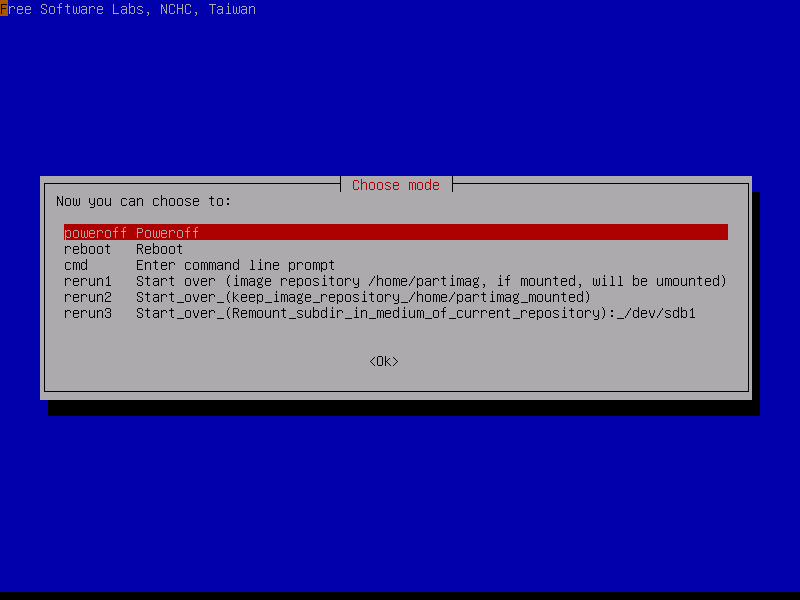
After that, you can remove the bootable media and reboot your system.
Conclusion
Clonezilla is a community-driven project, and something might change in the future. Please read every instruction from clonezilla carefully before proceeding. This is just a guide to get you started.
Data loss may occur in the process; make sure you have a good idea of what you’re doing and have a backup of your data before proceeding.
Though it’s not the most intuitive piece of software or the most user-friendly one, it’s quite powerful and reliable. But it has served me quite well, and I hope it’ll be useful for you too. And maybe in the following part we’ll go over how to restore the image we created in this part.

